How to Install Vcenter Server Appliance 6.0
Despite VMware's stride to push for the adoption of vCenter Server Appliance (vCSA) instead of its Windows-based twin, the latter is still an integral part of vSphere 6.5. In this short how-to post, I'll guide you through the steps required to install the latest incarnation of vCenter. To keep matters simple, I went for an embedded Platform Services Controller and PostgreSQL database solution. This setup will suffice for most SMBs out there. Broadly speaking, most SMB VMware based environment will fall under the Tiny or Small categories as per VMware's literature.
The table shows the different types of environments, their respective capacity in terms of the number of ESXi hosts and deployed VMs and the compute resources that need to be allocated to vCenter Server.
| Type | ESXi Hosts | VMs | VC RAM (GB) | VC CPUs |
| Tiny | 10 | 100 | 10 | 2 |
| Small | 100 | 1000 | 16 | 4 |
| Medium | 400 | 4000 | 24 | 8 |
| Large | 1000 | 10000 | 32 | 16 |
| X-Large | 2000 | 35,0000 | 48 | 24 |
Note:vCenter Server for Windows 6.5 runs on Windows Server 2008 SP2 or better. As per earlier versions, installing vCenter on an Active Directory Domain Controller IS NOT supported.
A complete list of requirements is available on the VMware vSphere 6.5 documentation site.
[thrive_leads id='18673′]
Getting on with the installation
Step 1:Prepare a VM or physical server. The specifications should reflect the environment you expect to be managing. Remember to allocate at least 10GB of RAM, 2 CPUs and 17GB of disk space over and above what's required for the Windows OS and other installed software. Also keep in mind that in time, the vCenter database will grow in size, so factor in this as well when allocating disk capacity.
Step 2:Decide on a hostname for vCenter (ex. vcw65). Create the corresponding A and PTR records on a DNS server and make sure that the records resolve correctly.
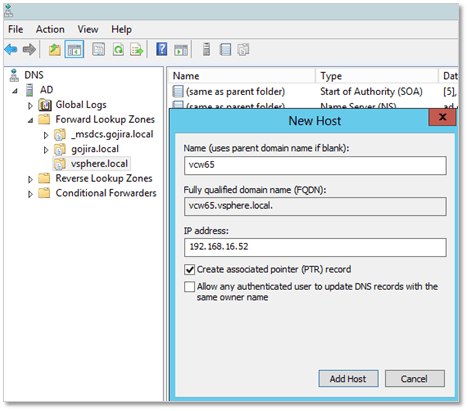
Figure 1 – Creating the DNS records for the vCenter Server for Windows instance
Step 3:Install Windows Server as you would normally do. After the install, apply all pending updates and patches.
Step 4: Make sure the Windows computer name matches the vCenter hostname i.e. vcw65. Reboot the server.
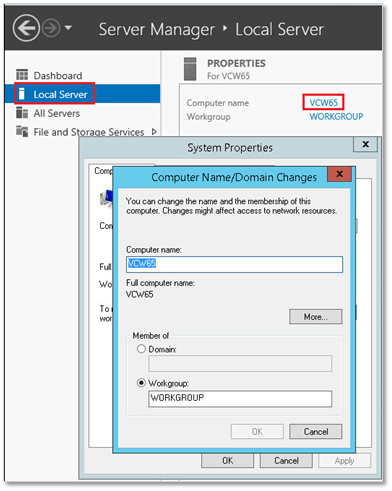
Figure 2 – Setting the vCenter Server Windows computer name
Step 5: Download the latest vCenter Server 6.5 ISO from my.vmware.com.
Step 6: When deploying vCenter to a VM, you can mount the ISO image as a DVD drive directly from a datastore or from local disk. If a physical machine is used instead, you can copy the ISO image to a folder on the Windows server and then mount it as a drive from the OS itself; right-click on the file and mount!
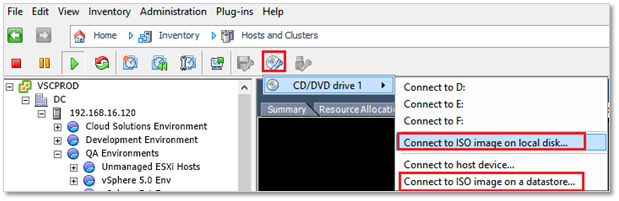
Figure 3 – Mount the ISO image on a VM from a local disk
Step 7: Login as administratoron the Windows box.
Step 8:Double-click on the DVD drive just mounted. This launches the VMware vCenter Installer.
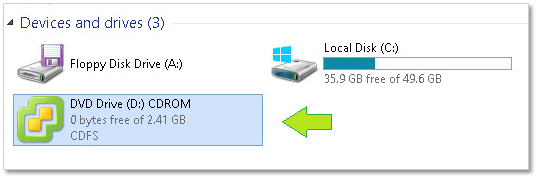
Figure 4 – The mounted ISO image in Windows Explorer
Step 9: From here on, the installer takes you through a series of screens and options, most of which are self-explanatory. Regardless, I listed the whole lot in a sequential order each accompanied by a brief note as follows.
The process is 100% identical to installing vCenter Server 6.0 for Windows as described in my somewhat old post How to set up a nested vSphere 6 nested environment. So really, very little has changed from an installation perspective. Under the hood, however, there have been some changes as explained here.
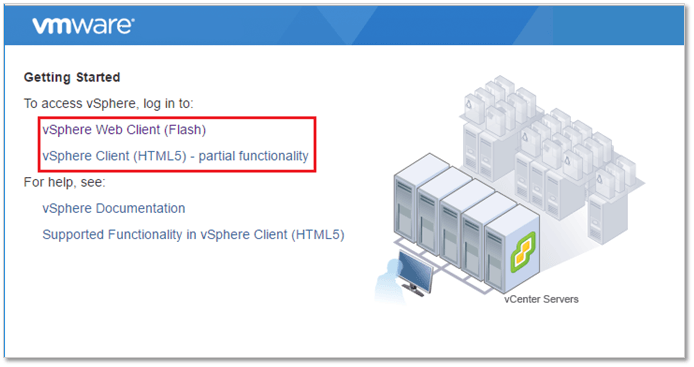
Figure 5 – The vCenter Server web landing page
Conclusion
Installing vCenter Server 6.5 for Windows is pretty straightforward provided you prepare the groundwork first. Compared to earlier versions, very little has changed except that vCenter is now a little bit more resource hungry. The thick (C#) vSphere client is, officially, no longer supported. This means that getting used to the vSphere Web client (or HTML5 client) is no longer optional.
I would also have loved to see the Web client laid to rest once and for all but since its new HTML5 alternative is still not up to par, I guess we will all have to wait until vSphere 7 is released!
UPDATE: vSphere 6.5 U1 has recently been released. It brings the HMTL5 client almost up to par with the vSphere Web client in terms of functionality. Read about it here.
[the_ad id="4738″]
How to Install Vcenter Server Appliance 6.0
Source: https://www.altaro.com/vmware/how-to-install-vcenter-server-6-5-for-windows/